

Key Takeaways
A DIY Mercedes brake job depends on matching parts to the exact vehicle and following model-specific procedures. Take your time, and stop if anything about the repair or the pedal feel is uncertain.
- Confirm the vehicle’s brake package and replacement-part fitment before ordering.
- Inspect pads and rotors together, and replace only what condition and specifications call for.
- Use safe lifting equipment and model-specific service procedures, especially at the rear.
- Tighten fasteners to the correct specifications, then pump the pedal before moving the car.
- Follow the pad maker’s bedding instructions and watch for changes in braking performance.
Confirm the job fits your Mercedes
A brake job can look straightforward, but parts and procedures vary across model years and brake packages. Before taking anything apart, identify the exact vehicle and confirm what is installed. A DIY Mercedes brake job is best approached as careful, model-specific maintenance—not a universal sequence that applies to every car.
Use the VIN and brake package to verify parts
Use the vehicle identification number (VIN), model year, and applicable brake-package details to confirm that pads, rotors, sensors, and hardware fit. Check the parts information against the car’s actual configuration rather than relying on a broad model-name match. If catalog information conflicts or leaves room for doubt, pause and confirm fitment with a qualified parts specialist before buying.
Decide whether to replace pads, rotors, or both
Inspect the pads and both rotor faces, and compare their condition with the service limits and inspection guidance for the specific vehicle. A new set of pads does not automatically make a worn, damaged, or out-of-spec rotor suitable for continued use. This quick comparison can help frame the inspection; the vehicle’s specifications and a physical check determine the decision.
| Part | What to inspect | What guides the decision |
|---|---|---|
| Pads | Friction material and evenness of wear | Wear limits and condition |
| Rotors | Thickness, surface condition, and damage | Minimum thickness and model guidance |
| Sensors and hardware | Damage, wear, or parts that must be renewed | Vehicle and parts-maker instructions |
Use the table as a prompt, not a substitute for measurements or model-specific service information. If a rotor is below its specified minimum, or a component is damaged, do not assume it is safe to reuse. A classic Mercedes brake guide may offer useful context for an older car, but its instructions should not be treated as a fitment or procedure match for a different model.
Know when a warning light or symptom calls for professional diagnosis
A warning message, grinding noise, visible leak, vibration, or unexpected change in pedal feel deserves attention before you begin—or before you drive again. A wear indicator can point to pad wear, but it does not explain every brake warning or symptom. When the cause is unclear, have the vehicle diagnosed rather than replacing parts by guesswork.
Search results can mix mechanical advice with unrelated material, so check that a source actually addresses your car and its brakes. Pages about local SEO for auto repair shops, a small-business SEO checklist, roofing workflow systems, a Brand Building Package, or custom seating changes are not brake-repair instructions. For an owner’s account of one specific repair, a CLA250 brake-job experience can be an anecdotal reference, not a substitute for service information.
Gather the right tools and replacement parts
Preparation prevents a half-finished repair from turning into a scramble for missing equipment. Confirm the replacement parts and required hardware, then make sure you can lift and support the car safely. The exact tools and service steps depend on the vehicle, so use this stage to verify the procedure before the wheels come off.
Choose model-correct pads, rotors, and hardware
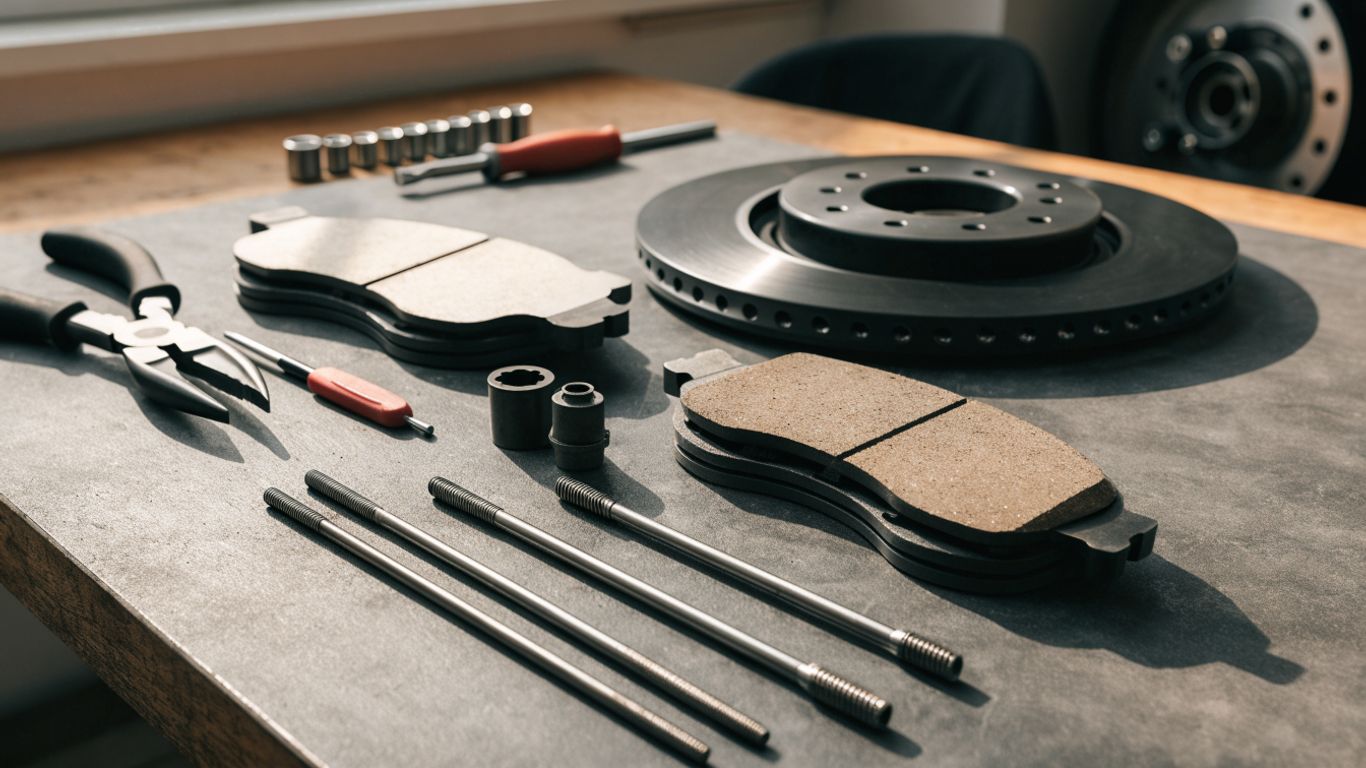
Match pads and rotors to the VIN and brake package, and check whether the job also calls for wear sensors or replacement hardware. Compare the replacement parts with the parts being removed before installation; a mismatch is a reason to stop, not to improvise. Keep the parts clean and follow the maker’s handling instructions, especially for friction surfaces.
Prepare a torque wrench, safe lifting equipment, and basic tools
Have a torque wrench, correctly sized hand tools, wheel chocks, a jack, and appropriately rated jack stands ready before starting. A torque wrench matters because tightening by feel is not a reliable substitute for the vehicle’s specified values. Organizing the essentials in advance also helps keep small hardware from getting misplaced.
A simple pre-start check keeps the setup focused on safety and completeness:
- Confirm the jack and stands are rated and in good condition.
- Gather the correct sockets and tools for the vehicle’s fasteners.
- Keep a torque wrench and the applicable torque specifications within reach.
- Set out replacement parts and any required sensors or hardware.
Once the equipment is together, check the service procedure for any special tool requirements that the basic kit does not cover. Do not proceed if you cannot support the vehicle securely or cannot confirm the required tightening specifications.
Check whether your model needs a scan tool or electronic parking brake service mode
Some vehicles require a scan tool, a prescribed electronic parking-brake service mode, or another model-specific procedure before rear brake work. Confirm the requirement in reliable service information before trying to retract a piston or operate the parking brake. If you cannot verify the correct procedure or equipment, have the work handled by a qualified technician.
Prepare the vehicle and work area safely
Give yourself a clean, well-lit workspace and enough time to complete the job without rushing. Brakes are safety-critical, and a stable vehicle matters as much as the replacement parts. Before lifting the car, read the service steps from start to finish so you know what must be disconnected, moved, or checked.
Park on level ground and secure the wheels
Park on a firm, level surface and follow the vehicle’s instructions for securing it before lifting. Chock the wheels that will remain on the ground, and keep the work area clear of people and loose equipment. Do not rely on a jack or the parking brake alone to hold a vehicle in place during service.
Lift the car at approved points and support it with jack stands
Use only the approved lifting points and support the vehicle on correctly positioned jack stands before working near or under it. Check that the car is stable before removing a wheel, and never put any part of your body under a vehicle supported only by a jack. If the approved points are unclear or damaged, stop and consult the vehicle’s service information.
Check brake-fluid level and protect painted surfaces
Check the brake-fluid reservoir before retracting a caliper piston, since fluid may rise as the piston moves back. Follow the model-specific procedure and avoid allowing fluid to contact painted surfaces; if a spill occurs, follow the appropriate cleanup guidance promptly. Do not open the hydraulic system unless the repair procedure requires it and you are equipped to do the work correctly.
Replace the front pads and rotors
Front-brake layouts differ, so use instructions that match the exact vehicle rather than copying a sequence from a similar-looking model. Work on one side at a time if that helps you keep track of component placement, and keep dirt and grease away from friction surfaces. If anything appears damaged or different from the service information, stop and investigate before proceeding.
Remove the wheel and inspect the caliper assembly
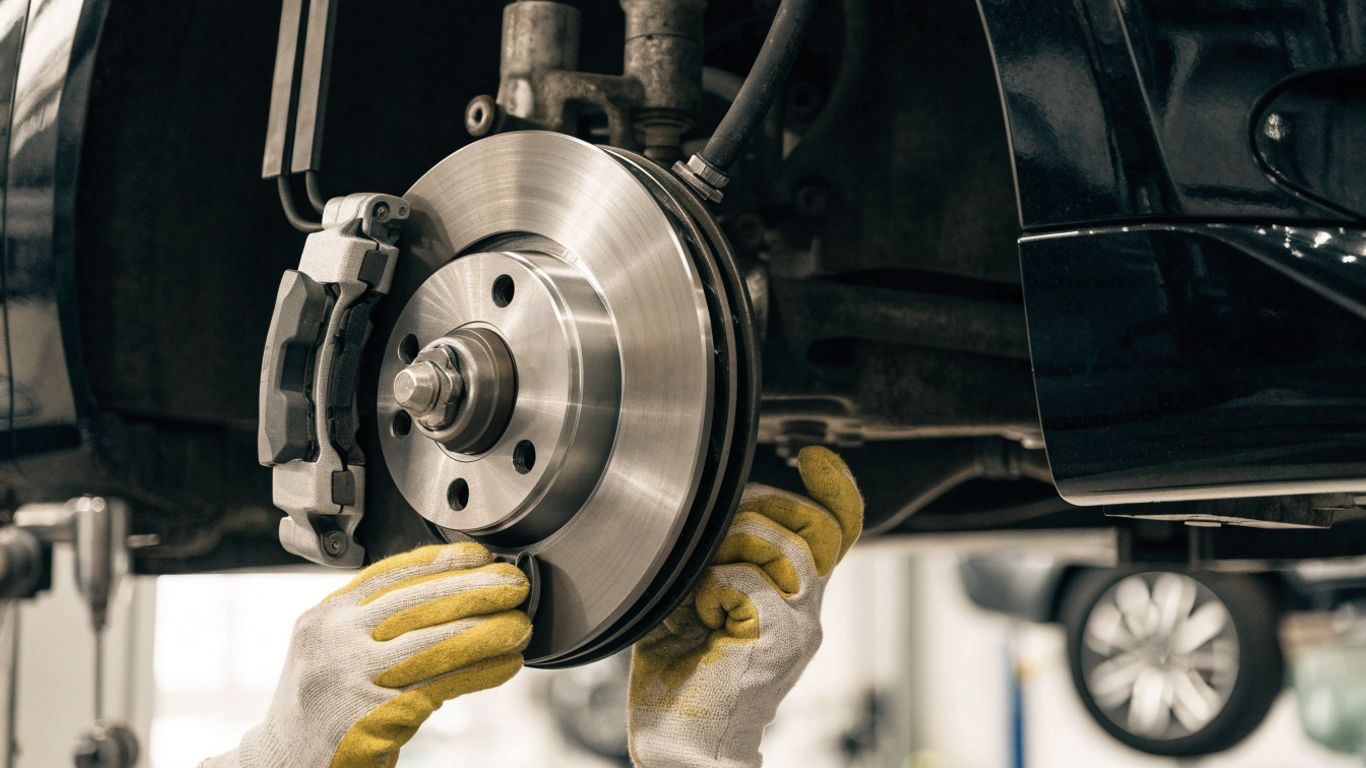
After confirming the vehicle is safely supported, remove the wheel and inspect the caliper, pads, rotor, hose, and visible hardware. Note how the parts are positioned before removing them, and look for leaks, torn boots, corrosion, or uneven wear. A simplified Mercedes pad guide can provide general orientation, but it should not replace the correct procedure for your car.
Retract the piston without damaging the boot or brake hose
Follow the service instructions for retracting the piston, using a suitable tool and applying force in the correct direction for that caliper. Keep the brake hose from twisting or carrying the caliper’s weight, and watch the dust boot as the piston moves. Stop if the piston binds, the boot is damaged, or the method described does not match the hardware in front of you.
Install the new rotor, pads, and required hardware
Clean and prepare the mounting surfaces as directed, then install the rotor, pads, and any required hardware in the specified order. Keep friction surfaces free of lubricant and contaminants, and apply any approved lubricant only where the service instructions allow it. A video may help you visualize the general sequence, but it cannot confirm that a procedure or torque value applies to your particular vehicle.
Before moving to the other side, compare the finished assembly with the service information and make sure the caliper and pads are seated correctly. Repeat the process on the other side using the same care, then reinstall the wheels according to the vehicle’s procedure.
Replace the rear pads and rotors
Rear brakes may involve an electronic parking brake or a piston design that requires a different retraction method from the front. Confirm those details before removing parts, and do not force a piston or operate an actuator without the required procedure. Rear work is not a place to guess based on familiarity with another vehicle.
Set the electronic parking brake to service mode when required
Check whether the vehicle requires its electronic parking brake to be placed in service mode before the rear caliper is serviced. Use the prescribed scan tool or onboard procedure, as applicable, and verify the system’s status before continuing. Do not attempt to wind back or push a motorized mechanism without confirming the correct method for the model.
Retract the rear piston using the correct method for the model
Rear caliper pistons may require a specific rotation, tool, or electronic procedure. Consult the applicable service instructions and keep the boot and hose protected while retracting the piston. If it will not move as expected, stop rather than adding force; binding can signal an incorrect method or another problem that needs diagnosis.
Reassemble the brakes and restore parking-brake operation
Install the rear rotor, pads, and required hardware as specified, then reassemble the caliper and wheel. Restore the electronic parking brake using the correct procedure and confirm that it operates normally before the vehicle is moved. For a model-specific example, this W211 and W212 rear-brake guide is limited to the vehicles it covers and is not a universal procedure.
Check your work before driving
The repair is not finished when the wheels are back on. Verify the assembled brakes, check the pedal, and confirm that no warning or obvious problem remains before moving the car. If a check fails, keep the vehicle parked until you identify and correct the cause.
Confirm fasteners are tightened to model-specific torque
Use the specified torque values for the applicable fasteners, including the wheel fasteners, and follow any instructions about single-use hardware. Tighten in the prescribed sequence with a torque wrench rather than estimating by feel. Record what you checked, especially if the job involved several distinct fasteners or procedures.
Pump the brake pedal and verify fluid level
With the vehicle stationary, pump the brake pedal as directed until it feels consistent, then check the fluid level and reservoir condition. A low or soft pedal is not something to test on the road; it may indicate that the brakes are not ready to use. Follow the vehicle’s instructions for any fluid adjustment and do not overfill the reservoir.
Investigate noises, leaks, warning messages, or a soft pedal before moving the car
Inspect around the calipers and hoses for leaks and check for warnings or unusual sounds. If you notice a leak, a soft pedal, a persistent warning, or anything that feels wrong, do not drive the car to see whether it clears. Seek professional diagnosis, and arrange appropriate transport if the brakes may not be functioning safely.
Bed in the new brakes and monitor performance
New friction components may need a bedding procedure to establish their intended contact, but the correct method depends on the pad maker’s instructions. Do not assume that every pad uses the same sequence or distances. Choose a safe setting for any required bedding and allow yourself room to respond if braking feels abnormal.
Follow the pad maker’s break-in instructions
Read and follow the instructions supplied with the pads, including any stated limits or cautions. If no clear instructions are provided, ask the parts supplier or a qualified technician rather than inventing a procedure. Bedding is not a substitute for correct installation or a sound brake system.
Avoid hard stops during the initial bedding period
Unless the pad maker’s instructions say otherwise, avoid unnecessary hard braking while the new components settle in. Drive cautiously, leave extra room, and do not conduct aggressive tests in traffic. If braking response changes or the car behaves unexpectedly, stop in a safe place and investigate before continuing.
Recheck for unusual wear, vibration, or braking changes
After the initial drives, pay attention to noises, vibration, warning messages, and changes in pedal feel or stopping behavior. Recheck the brakes as recommended by the vehicle or parts maker, and do not dismiss symptoms as normal simply because the parts are new. A prompt inspection can catch an installation issue before it becomes a more serious problem.
Conclusion
A careful brake job begins with correct fitment and ends only after the assembly, pedal, and parking-brake operation have been checked. Follow the procedure for the exact vehicle, work within your tools and experience, and leave the car parked if anything feels uncertain.
Frequently Asked Questions
Can I replace brake pads without replacing the rotors?
Sometimes, but the rotors must be inspected and meet the applicable specifications. Follow the vehicle’s service guidance and replace any rotor that is damaged or outside its limits.
Do I need to replace pads and rotors as a set?
Not automatically. The decision depends on the condition and measurements of the rotors, the pads, and the vehicle’s requirements.
How do I know which brake parts fit my car?
Confirm fitment using the VIN, model year, and brake-package details. If the catalog information is ambiguous, verify it before ordering or disassembling the brakes.
Can I use a regular jack while working on brakes?
A jack may be used to lift the vehicle, but it is not a safe support for working on it. Use suitable jack stands at the approved support points and verify stability before starting.
Do rear brakes always need electronic parking-brake service mode?
No. Requirements vary by model and brake design. Check the correct service information before working on the rear calipers.
What should I do if the brake pedal feels soft after the repair?
Do not drive the car. Recheck the work and fluid level according to the service procedure, and have the system diagnosed if the cause is not clear or the pedal does not feel correct.
How should I bed in new brake pads?
Follow the instructions supplied by the pad maker. Avoid assuming that a procedure for one pad compound or vehicle applies to another.