

Key Takeaways
A careful coolant service is less about speed than about using the correct fluid, following the vehicle-specific procedure, and removing trapped air before driving. The safest Mercedes coolant flush procedure starts with a completely cool engine and ends with a leak and temperature check.
- Confirm the service requirement and correct coolant specification first.
- Work only on a cool vehicle and protect painted and electrical surfaces.
- Drain coolant from every accessible circuit rather than relying on the expansion tank alone.
- Refill gradually with the correct concentration and follow the model-specific bleeding process.
- Stop and seek diagnosis if the coolant is oily, heavily contaminated, or the engine overheats.
Understand when a Mercedes coolant flush is needed
Coolant gradually loses its protective properties, but not every cooling-system concern calls for the same service. The vehicle’s model year, engine, coolant history, and condition of the drained fluid all matter. Use the owner’s manual and service records as the starting point, then let the condition of the system guide the depth of the work.
Recommended service intervals and owner’s manual guidance
Mercedes models do not all share one universal coolant interval, so avoid choosing a date based only on a general online recommendation. Check the owner’s manual, maintenance schedule, and any service documentation for the exact engine and production year. If the history is unknown, a technician can assess the coolant and system before deciding whether a drain-and-fill or a fuller flush is appropriate.
A useful reference can be a model-specific coolant flush guide, especially when you need to compare the general sequence with the instructions for a particular engine. Treat such material as supplementary, not as a replacement for the vehicle’s own service information.
Symptoms of degraded or contaminated coolant
Old coolant may look darker than expected, cloudy, rusty, or unusually thick. A sweet smell after driving, dried residue around a hose connection, or a falling level in the expansion tank can also point to a leak rather than ordinary coolant aging. Changes in cabin heat may occur when circulation is restricted or air has entered the system.
Do not judge coolant only by color. Different approved coolants can have different appearances, and mixing incompatible products can create confusion or contamination. The fluid’s history and the condition of the components are more useful than color alone.
When a drain-and-fill is enough
A drain-and-fill may be suitable when the coolant is clean, the system has no signs of sludge or oil, and the maintenance record supports routine replacement. It replaces only the fluid that drains freely, so it is not the same as a complete flush through every circuit. That distinction matters when the coolant has been mixed incorrectly or the system has been opened for a major repair.
Before choosing the simpler service, inspect the expansion tank and sample a little drained fluid into a clean container. If it appears uniform and the vehicle has no temperature or circulation symptoms, a measured drain-and-fill may be reasonable for that model.
Signs the cooling system needs further diagnosis
Persistent overheating, rapid coolant loss, a pressurized hose after a cold start, or repeated air in the system deserves diagnosis before more coolant is added. Oil floating in the coolant, exhaust-gas odor, heavy rust, or thick sludge can indicate a fault beyond routine fluid maintenance. Continuing to flush without finding the cause may hide the problem briefly while leaving the underlying damage untouched.
The same principle applies to unusual electrical behavior around cooling fans or pumps. When the cause is uncertain, stop the service and arrange a proper inspection rather than guessing at parts.
Gather the correct tools, coolant, and safety equipment
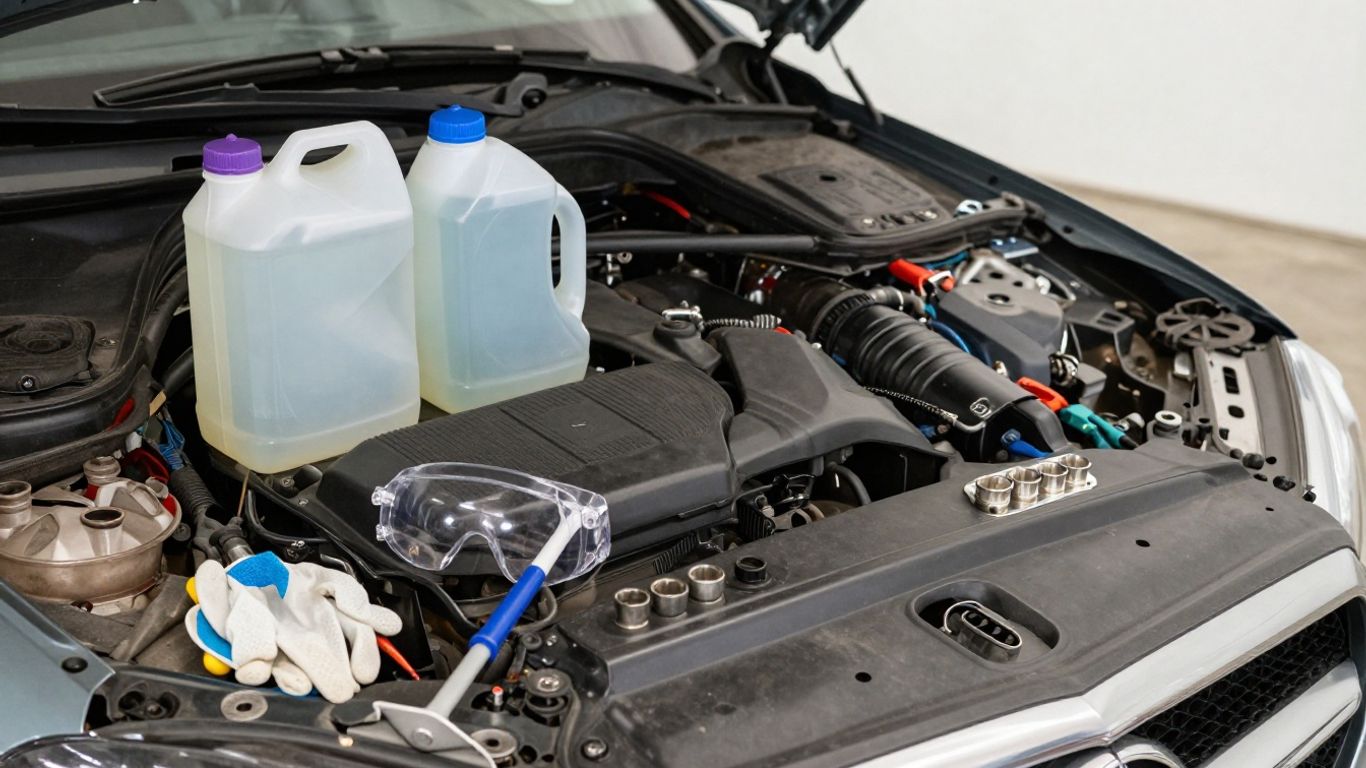
Preparation prevents most avoidable problems during a coolant service. You need the correct fluid specification, enough capacity for the vehicle, secure containers, hand tools, and a way to reach the drain points without working beneath an inadequately supported car. Keep the vehicle’s documentation close because drain locations and bleeding steps vary.
Choosing Mercedes-approved coolant and distilled water
Use coolant that meets the specification stated for the vehicle, not simply a fluid marketed for a broad range of cars. Premixed coolant should not be diluted unless its label says so; concentrated coolant generally requires distilled or deionized water in the specified ratio. The correct concentration protects against freezing and corrosion without making the mixture unnecessarily thick.
Avoid topping up an unknown coolant with a different chemistry just to reach the full mark. If the existing fluid cannot be identified, draining and refilling with one confirmed specification is safer than creating an unverified mixture.
Selecting containers, hand tools, and protective equipment
Choose a drain pan larger than the system’s expected capacity and use a second clean container if you need to preserve a sample. Nitrile gloves, eye protection, absorbent pads, a funnel designed for coolant, and basic sockets or pliers are useful. Never rely on a shallow household container that can tip when fluid begins flowing quickly.
A compact preparation list helps keep the job orderly:
- Correct-specification coolant and distilled water, if required.
- Large, stable drain pans and sealable waste containers.
- Gloves, eye protection, absorbent material, and rinse water.
- Vehicle-specific instructions for drain points and bleeding.
After gathering these items, check that the funnel and containers are clean. Dirt introduced during filling can be harder to remove than the old coolant.
Checking the vehicle-specific drain points
Some systems drain from the radiator, while others also have an engine drain or separate cooling circuits. Identify the access panels, drain plugs, hose clamps, and any sealing washers before opening anything. A model-specific video for an E300, such as this E300 coolant service reference, can help illustrate the general arrangement, but it should not override the instructions for your own vehicle.
Do not force a plastic drain fitting or use a tool that damages its head. If a drain point is inaccessible or seized, reassess the method before applying leverage near the radiator or a fragile hose neck.
Preparing for spills, disposal, and access
Coolant is toxic and attractive to animals, so keep pets away and clean even small spills immediately. Plan the route from the drain pan to a sealed container before starting, and never pour used coolant onto the ground or into a household drain. Local waste facilities or automotive recyclers can advise on accepted coolant disposal.
Raise the car only with equipment rated for its weight and support it correctly; never work under a vehicle held only by a jack. Removing an undertray can improve access, but keep its fasteners organized so reassembly does not become an afterthought.
Prepare the Mercedes before draining the coolant
A calm setup makes the drain cleaner and reduces the chance of burns or spilled fluid. Park where the vehicle can remain undisturbed through the refill and first heat cycle. Before opening the system, inspect the surrounding components so you can distinguish an old leak from one created during the service.
Parking on a level surface and allowing the engine to cool
Park on a level, stable surface, select the appropriate park or neutral setting, and apply the parking brake. Allow the engine and radiator to cool fully; coolant can remain hot and pressurized long after the ignition is switched off. A cool expansion tank should feel safe to approach without rushing or forcing its cap.
Keep the keys away from the vehicle if another person is helping. Accidental startup while components are removed can turn a straightforward service into a serious hazard.
Disconnecting covers and components that block access
Remove only the covers and undertrays needed to reach the expansion tank, radiator drain, and any engine drain point. Photograph routing and fastener locations before taking panels off, particularly when clips or mixed-length bolts are involved. Place removed hardware in a labeled tray rather than on the floor.
Do not disconnect electrical connectors merely to create space unless the service instructions call for it. A little extra time spent finding the correct access route is preferable to damaging a connector or harness.
Inspecting hoses, the radiator, and the expansion tank
Look for softened hoses, swelling, cracks, staining, bent fins, and residue at hose ends. Inspect the expansion tank for discoloration or fine cracks and check that its cap is not visibly damaged. These observations can explain a low level or recurring leak and may change the service from a flush to a repair.
A cooling-system inspection should also include clamps and accessible seals. If a hose is brittle or wet at its connection, plan the repair before refilling rather than hoping a fresh mixture will solve it.
Protecting electrical components from coolant exposure
Cover nearby connectors, alternator components, and exposed wiring with suitable protective material without trapping heat or obstructing the drain path. Keep absorbent pads beneath the work area and wipe splashes promptly. Coolant that reaches a connector can create a separate fault even when the cooling work itself is done correctly.
For the same reason, do not spray water broadly around the engine bay during cleanup. Use a controlled wipe and dispose of contaminated absorbent material according to local requirements.
Drain the old coolant from the cooling system
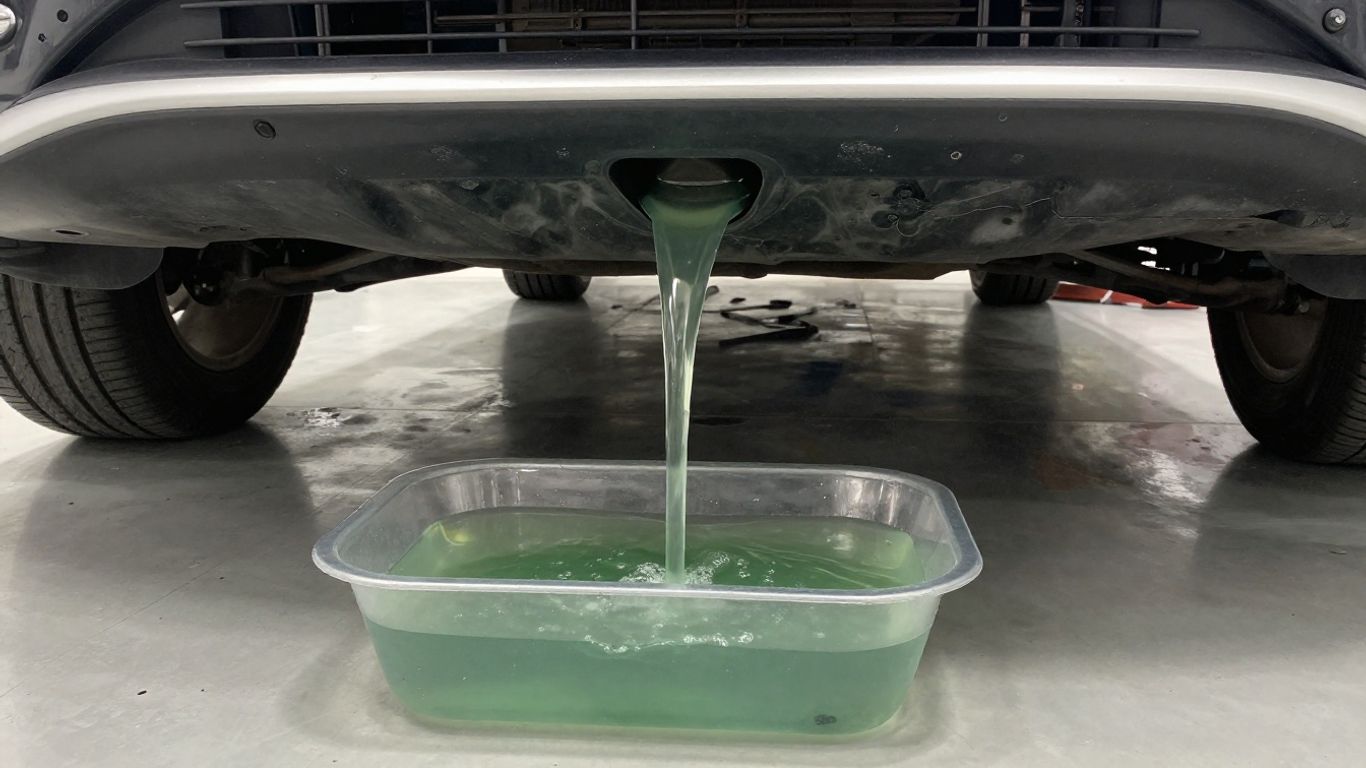
Draining should be deliberate rather than hurried. Open the system in the order specified for the vehicle, capture fluid from each accessible circuit, and watch its appearance as it leaves. If the first stream is unexpectedly pressurized or the fluid looks contaminated, pause and reassess before continuing.
Removing pressure from the expansion tank safely
Only remove the expansion-tank cap when the engine is fully cool. Turn it slowly, stopping if you hear pressure escaping, and use a cloth for additional grip and splash protection. A cold system should not behave as though it is heavily pressurized; that symptom warrants investigation.
Once the cap is removed, inspect its seal and the tank opening. Keep the cap clean and place it somewhere safe so grit cannot fall into the tank while the system is open.
Opening the radiator and engine drain points
Position the drain pan before opening the radiator drain, lower hose, or engine drain plug identified for the model. Loosen the fitting gradually and allow the initial flow to settle before adjusting the pan. Some vehicles may require access from below, so confirm that the car is securely supported before reaching underneath.
Replace sealing washers or damaged plugs as specified, and do not overtighten plastic fittings during reassembly. A drain point that will not close correctly can turn the refill into an immediate leak.
Capturing coolant from multiple circuits
The expansion tank alone rarely represents the entire cooling system. Capture fluid from the radiator and any engine or auxiliary circuit that the vehicle’s instructions identify. Moving the pan as the flow changes helps prevent contamination of the floor and gives you a more accurate view of the total drained fluid.
Keep samples from different points separate if the condition of the coolant is unclear. Comparing them can show whether contamination is concentrated in one circuit rather than evenly distributed.
Identifying oil, rust, sludge, or other contamination
Let the drained fluid settle in a transparent container before judging it. A thin oily film, floating particles, rust-colored sediment, or creamy sludge is not a normal reason to simply refill and drive away. Record what you see and inspect for a possible internal leak, corrosion, wrong coolant, or neglected maintenance.
A clean drain-and-fill may be enough for ordinary aging, but severe contamination calls for diagnosis and possibly repeated rinsing. Do not mix the sample back into the vehicle under any circumstance.
Flush the system and refill it correctly
Flushing removes old fluid and residue that a single drain may leave behind, but the method must suit the vehicle and the contamination. Use only water or a manufacturer-approved cleaning product where the instructions permit it. The goal is a clean, correctly mixed refill—not simply a full expansion tank.
Deciding whether to use water or a manufacturer-approved flush solution
For light service, distilled water may be used where the vehicle’s instructions allow it, followed by a complete drain before adding the final coolant mixture. A dedicated flush solution may be appropriate for deposits or contamination, but follow its label and the vehicle procedure precisely. Household detergents are not substitutes for cooling-system products.
When the system shows oil, sludge, or repeated overheating, a chemical flush should not replace fault diagnosis. It may be necessary to repair the cause first and then establish a cleaning plan.
Rinsing until the drained fluid runs clear
Close the drain points, fill with the permitted rinse fluid, and run the engine only under the model-specific instructions. Set the cabin heat as directed so coolant can circulate through the heater circuit, then allow the engine to cool before draining again. Repeat only as needed, taking care not to leave a large amount of rinse water behind.
Fluid that looks clearer is encouraging, but clarity alone does not prove that every circuit is clean. Compare the final drain with the earlier samples and keep the number of rinse cycles practical for the system.
Mixing coolant to the correct concentration
Use the vehicle’s stated concentration and the coolant maker’s mixing instructions. With concentrate, measure coolant and distilled water accurately in a clean container rather than guessing by eye in the expansion tank. Premixed product should be used as supplied unless its instructions say otherwise.
This is where the correct concentration matters most: too much water reduces protection, while too much concentrate can impair heat transfer. Confirm the final volume before pouring so you do not run short midway through filling.
A simple reference table can help organize the decision without replacing the specification sheet:
| Product form | Add water? | Practical check |
|---|---|---|
| Premixed coolant | Usually no | Follow the container label |
| Concentrated coolant | Usually yes | Measure the specified ratio |
| Unknown or mixed coolant | Do not assume | Drain, inspect, and refill correctly |
| Approved flush solution | Only as directed | Complete the required rinse |
After mixing, label any remaining container with its contents and date. That small step prevents an unknown bottle from being mistaken for premixed coolant later.
Filling the expansion tank without trapping air
Close the drains securely, then add the final mixture slowly through the prescribed fill point. Pause as the level settles and follow any instruction to open a bleed screw, use a vacuum filler, or manipulate a hose. Do not overfill the expansion tank; use its cold-level markings.
If the vehicle uses a special filling tool or sequence, follow that procedure rather than improvising. A full tank does not prove that the engine, heater circuit, and radiator are all filled.
Bleed and verify the Mercedes cooling system
Air left in the system can interrupt circulation and create misleading symptoms. Bleeding is therefore part of the service, not a cosmetic final step. Work through the model-specific sequence and verify the level again after the vehicle cools.
Using the model-specific bleeding procedure
The correct procedure may involve a bleed screw, a vacuum filling tool, a specified ignition position, or a particular run-up sequence. Read the instructions for the exact engine before starting it. Do not assume that squeezing hoses or repeatedly revving the engine is an acceptable substitute.
Keep the expansion-tank level within the marked range while bleeding. If the level falls quickly or coolant escapes from an unexpected point, stop and locate the leak before continuing.
Running the heater and monitoring coolant circulation
Set the heater as the vehicle procedure directs and watch for steady cabin heat as the engine warms. Gurgling behind the dashboard, alternating hot and cold air, or a sudden level change may indicate trapped air. Some systems require more than one cool-down and refill cycle before the level stabilizes.
A model-specific A220 flush reference can illustrate the general relationship between draining, refilling, and removing air, but it is not a universal bleeding instruction. Use it only as background while following the correct documentation.
Checking the temperature gauge and warning messages
Monitor the temperature gauge continuously during the first warm-up. Stop the engine if the gauge rises abnormally, a coolant warning appears, steam is visible, or the heater suddenly loses heat. Never open a hot expansion tank to investigate.
The gauge is only one piece of evidence. Check the coolant level after a complete cool-down and pay attention to warning messages that return after the level has been corrected.
Inspecting for leaks after the first heat cycle
After the first heat cycle and cool-down, inspect the radiator, hoses, drain plugs, expansion tank, and water-pump area for wetness or dried residue. Recheck the level on a level surface and add only the correct mixture if it is below the cold mark. A small change after air leaves the system can be normal; a continuing drop is not.
Use a pressure test or other suitable inspection when the source is not visible. Keep a short record of the level and temperature behavior over the next few drives.
Troubleshoot problems after a coolant flush
A successful refill should leave the engine at a stable operating temperature, the cabin heater consistent, and the coolant level steady. Problems after service often come from trapped air, an unsecured drain, a damaged seal, or a fault that existed before the flush. Treat new symptoms seriously rather than repeatedly topping up.
Diagnosing air pockets, gurgling, and inconsistent cabin heat
Gurgling, sloshing, and intermittent cabin heat commonly suggest air remains in the heater circuit or another high point. Recheck the specified bleeding process only when the engine is cold and the vehicle is safely positioned. If symptoms return after proper bleeding, look for a leak drawing air into the system or a circulation problem.
Do not use cabin heat alone as proof that the system is fully bled. Stable temperature, level, and circulation behavior are better indicators when considered together.
Responding to overheating or low-coolant warnings
If the engine overheats or a low-coolant warning appears, pull over safely and switch it off. Allow the system to cool completely before checking the level, and never remove the cap while hot. A warning that returns after a correct refill may indicate a leak, thermostat issue, pump problem, sensor concern, or trapped air.
Repeatedly adding coolant without finding where it goes is not a repair. Arrange a pressure test and further diagnosis if the level falls again.
Checking for leaks at hoses, seals, and the water pump
Inspect every connection disturbed during the service, including drain plugs, hose ends, clamps, the expansion-tank cap, and visible water-pump areas. Look for fresh wetness as well as a chalky or colored residue left after drying. A leak may appear only when the system warms and pressure rises.
If a fitting is cracked or a hose feels swollen and weak, replace the affected part according to the vehicle’s requirements. Do not compensate for a damaged component by tightening it indefinitely.
Knowing when professional diagnostic equipment is needed
Professional testing is appropriate when overheating persists, coolant is contaminated with oil, pressure builds abnormally, a warning message remains, or the source of coolant loss cannot be found. A workshop may need pressure testing, scan data, combustion-gas testing, or a model-specific bleeding tool. The right test is safer and usually cheaper than replacing unrelated parts.
The same careful documentation used in other technical work—such as auto failover, follow-up strategies, Shopify migration, selling on Amazon, or checking ocean-view property details—starts by defining the actual problem before taking action. Here, that means recording the warning, temperature, fluid condition, and leak pattern before authorizing repairs.
Conclusion
A safe coolant service depends on matching the fluid and procedure to the exact vehicle, working only when the engine is cool, draining and rinsing methodically, and verifying the system after it reaches operating temperature. If contamination, overheating, or repeated coolant loss remains, pause the DIY work and have the cooling system diagnosed before driving further.
Frequently Asked Questions
How often should coolant be flushed?
The correct interval depends on the vehicle, engine, coolant specification, and maintenance schedule. Check the owner’s manual and service history rather than relying on one interval for every model.
Can I flush coolant with tap water?
Tap water may contain minerals that contribute to deposits, so distilled or deionized water is generally preferred when water is permitted by the procedure. Follow the coolant and vehicle instructions.
Is a drain-and-fill the same as a coolant flush?
No. A drain-and-fill replaces the fluid that drains freely, while a flush uses additional rinsing or an approved cleaning process to remove more of the old mixture and residue.
Why is my cabin heater blowing cold air after a refill?
Cold or inconsistent cabin heat can indicate trapped air, low coolant, restricted circulation, or another cooling-system fault. Let the engine cool and check the level before further diagnosis.
Can I open the expansion tank when the engine is warm?
Do not open it while the system is hot or pressurized. Hot coolant can escape violently and cause serious burns; wait until the engine is completely cool.
What does oily coolant mean?
An oily film or creamy sludge may indicate contamination or an internal leak. It is not a normal result of routine coolant aging and should be investigated before continued driving.
What should I do if the temperature warning returns after a flush?
Stop safely, switch off the engine, and allow it to cool before checking anything. If the warning returns after the level is corrected, arrange professional testing for leaks, air, circulation, and related faults.