

Key Takeaways
A Mercedes spark plug replacement is usually straightforward when the correct parts, tools, and torque specifications are used. The right service interval depends on the engine, model year, plug type, and how the vehicle is driven.
- Check the owner’s manual or service records before choosing an interval.
- Match every plug to the engine code, model year, gap, and heat range.
- Work only on a fully cool engine and keep debris out of the plug wells.
- Replace damaged coils, boots, or wiring instead of ignoring related faults.
- Verify idle quality, starting, and diagnostic codes after the repair.
Know when your Mercedes needs new spark plugs
Spark plugs gradually lose their ability to create a consistent spark. That change may first appear as a minor hesitation, then become a rough idle, poor starting, or a noticeable misfire. A Mercedes spark plug replacement should be based on both the service schedule and the engine’s current behavior.
Recommended replacement intervals by engine and model
There is no single interval that suits every Mercedes engine. The correct mileage or time period depends on the engine design, the specified plug, and the model year, so the owner’s manual and service history should take priority. A general guide to Mercedes-Benz service intervals can provide useful background, but it should not replace the vehicle-specific schedule.
If records are missing, ask a technician to identify the engine code and inspect the existing plugs. Replacing them simply because the vehicle has reached an approximate mileage can be sensible maintenance, but the specification still needs to be confirmed first.
Symptoms of worn or fouled spark plugs
Worn plugs can cause rough idling, sluggish acceleration, difficult starting, reduced fuel economy, or intermittent engine misfires. Fouling may result from oil, fuel, carbon, or coolant entering the combustion area, and a new plug alone may not correct the underlying problem.
Pay attention to whether the symptom occurs during cold starts, under load, or only at idle. That pattern helps separate a plug problem from a failing coil, vacuum leak, injector issue, or mechanical fault.
How driving habits affect spark plug life
Frequent short trips can leave the engine operating below its ideal temperature for much of the journey. Repeated cold starts, heavy traffic, towing, spirited acceleration, and dusty conditions can also place more demand on the ignition system.
Conversely, steady highway driving may be gentler on the plugs, although it does not eliminate scheduled maintenance. Treat the published interval as a starting point and investigate any new drivability change rather than waiting for the next service date.
When warning lights require immediate attention
A steady check-engine light should be diagnosed soon, especially if the engine is running poorly. A flashing light generally indicates an active misfire that may damage the catalytic converter, so reduce load and stop driving if the vehicle shakes, loses power, or smells strongly of unburned fuel.
Do not assume the warning light proves that the spark plugs are at fault. Read the diagnostic codes and test the relevant ignition, fuel, and air systems before ordering parts.
Choose the correct spark plugs for your Mercedes
Correct part selection is the foundation of the repair. Similar-looking plugs can differ in thread size, reach, electrode design, heat range, and required gap. Confirm the specification against a reliable parts catalogue or the vehicle’s engine information rather than relying on appearance.
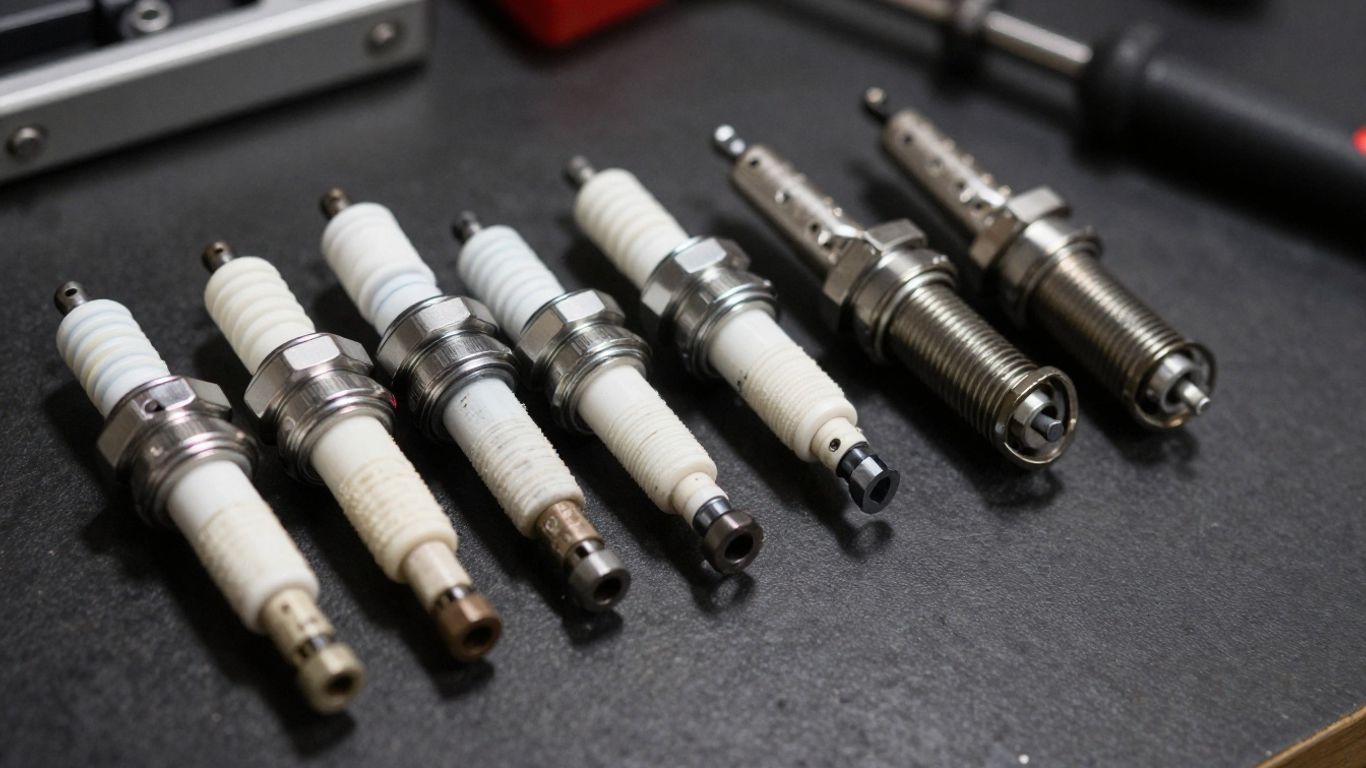
Matching plugs to the engine code and model year
Start with the exact model, model year, engine code, and, where relevant, production date. Some engines changed during a model run, and a plug listed for a similar vehicle may still have the wrong dimensions or operating range.
Record the old plug’s markings, but use them only as a cross-check. A previous repair may already contain an incorrect part, so the manufacturer’s application data and the engine-specific service information matter more.
OEM versus aftermarket spark plugs
An original-equipment plug is made to the vehicle maker’s stated application, while a reputable aftermarket plug may meet the same dimensional and performance requirements. The key is not the label alone; it is an exact match for the engine and a trustworthy source.
When comparing options, check the full part number, electrode material, gap, and installation instructions. Buying from a supplier that can verify fitment is often more useful than choosing the cheapest box.
Copper, platinum, and iridium plug differences
Copper-core plugs generally conduct heat and electricity well but may have a shorter service life. Platinum and iridium designs use harder electrode materials that can resist wear for longer, though the vehicle’s specified design should always take precedence over a general material preference.
Do not substitute a different electrode type simply because it is marketed as an upgrade. The ignition system, combustion chamber, and recommended interval were designed around a particular plug specification.
Why plug gap and heat range matter
The gap controls how much voltage is needed for the spark to jump between the electrodes. A gap that is too wide can strain the ignition system or cause a misfire, while an overly narrow gap can affect combustion and response.
Heat range describes how quickly the plug transfers heat away from its firing end. It is not a quality ranking. Use the stated gap and heat range, and avoid bending a fine-wire electrode aggressively during adjustment.
Prepare for a Mercedes spark plug replacement
Preparation prevents most avoidable problems. Gather the correct plugs, a suitable socket, an extension, a torque wrench, cleaning equipment, and any replacement seals or ignition components identified during inspection. A calm, organised setup also helps prevent dirt from entering the engine.
Tools and replacement parts you need
A typical job may require a spark plug socket, ratchet, extensions, a torque wrench, compressed air or a soft brush, dielectric grease where specified, and a small inspection light. Some engines need a specialised thin-wall socket or additional tools to remove covers and coils.
The parts list should include every plug, not just the one associated with a current misfire code. If a coil boot is torn or oil-soaked, plan for that repair before reassembly.
Safety steps before working on the engine
Park on a stable, level surface, engage the parking brake, and keep loose clothing and tools away from moving components. Disconnecting the battery may affect vehicle settings, so follow the repair information for the specific model before doing so.
Never remove ignition components while the engine is running. Keep fuel, solvents, and open flames away from the work area, and use eye protection when blowing debris from the plug wells.
Allowing the engine to cool completely
Aluminium cylinder heads can be damaged when plugs are removed or tightened while the engine is hot. Allow the engine to cool fully, especially after a long drive, and do not rely on the temperature gauge alone.
A cool engine also makes it easier to feel whether the plug threads are starting cleanly. If resistance appears too early, stop and investigate instead of forcing the tool.
Inspecting ignition coils, boots, and wiring
Remove enough surrounding material to examine the coils, boots, connectors, and visible wiring. Look for cracking, carbon tracking, corrosion, brittle insulation, or oil contamination. These parts can create symptoms that resemble worn plugs.
A parts supplier’s fitment checking process is useful as a general reminder that correct identification comes before ordering, although the vehicle’s repair information remains the authority for this job.
Follow the spark plug replacement process
The sequence is simple, but patience matters more than speed. Keep removed components organised by cylinder, protect open plug wells from debris, and never use force to compensate for poor access. The following steps describe the general process; model-specific instructions should take priority.
Removing engine covers and ignition components
Remove the engine cover and any intake ducting or brackets that block access, keeping fasteners in a labelled tray. Disconnect each coil carefully and release connectors by their locking mechanism rather than pulling on the wires.
Marking cylinder positions can help during reassembly, particularly when several components look identical. Place clean covers over exposed areas if the work will be interrupted.
Cleaning the spark plug wells
Before loosening a plug, remove loose grit, leaves, and dust from around the well. Compressed air is effective when used carefully, but hold tools and debris away from the open engine area. This step protects the threads and combustion chamber from contamination.
Clean first, then inspect again with a light. If oil or coolant is present, pause the replacement and look for the source before installing new plugs.
Loosening and removing the old plugs
Seat the correct socket squarely on the plug and loosen it with controlled pressure. If a plug resists unusually strongly, do not use a long breaker bar immediately; confirm that the socket is fully engaged and consult the repair procedure.
Lift each plug out and compare its condition with the others. Differences in deposits or wear can point to a cylinder-specific problem that deserves further testing.
Installing new plugs with the correct torque
Start every new plug by hand through the socket or a short extension so the threads can be felt. Once it is seated, use a calibrated torque wrench and the specification for that engine. Correct tightening torque matters because both loose and over-tightened plugs can cause expensive trouble.
The sealing method varies by plug design, so do not automatically add anti-seize or alter the specified torque. Follow the plug maker’s instructions and the vehicle service information.
Reassembling the ignition system
Refit the coils, boots, connectors, covers, ducts, and brackets in the reverse order. Confirm that each connector clicks into place and that no wiring is trapped beneath a cover or rubbing against a hot surface.
Before starting the engine, make a final visual check for forgotten tools, loose hoses, and unconnected plugs. That small pause can prevent a second repair.
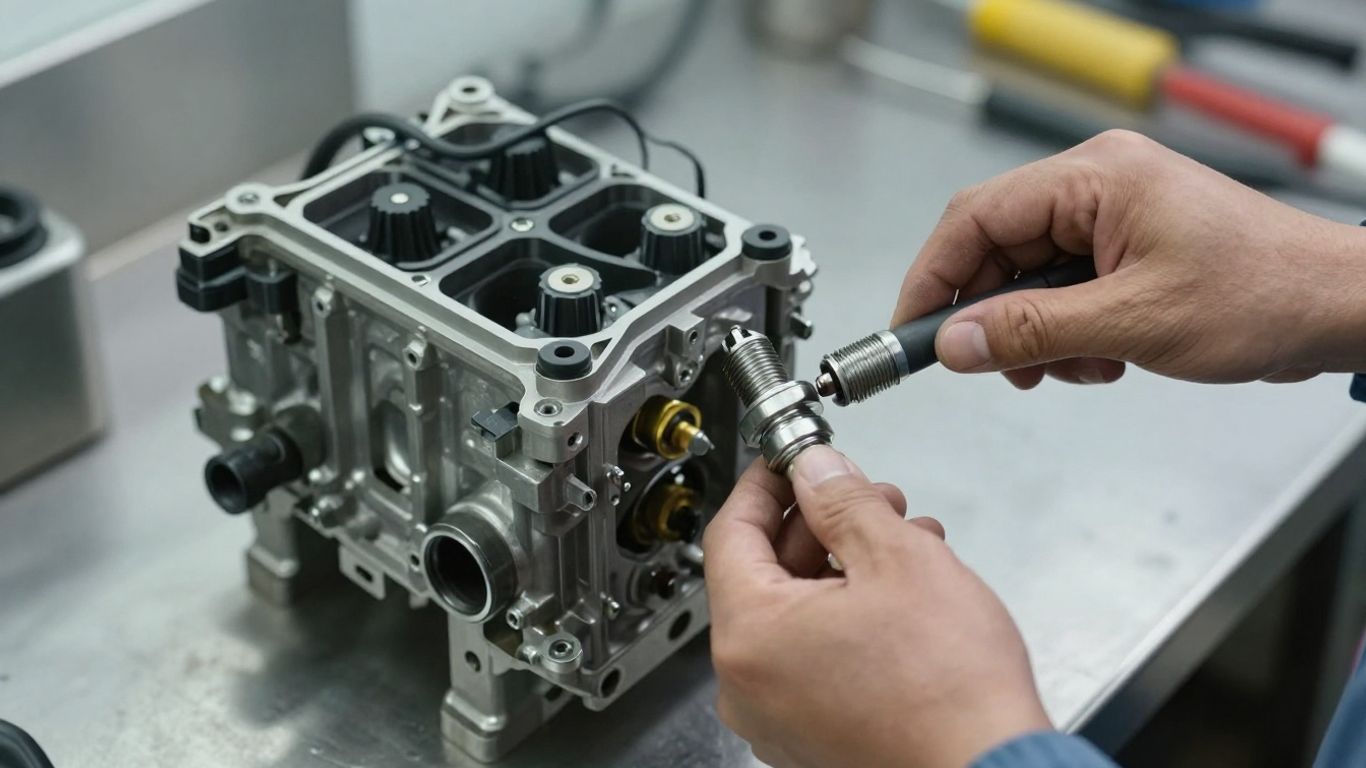
Avoid common replacement mistakes
Most unsuccessful plug changes are not caused by the basic idea of the repair. They come from an incorrect part, contamination, rushed installation, or an overlooked related fault. A few deliberate checks make the work safer and more repeatable.
Using the wrong plug specification
A plug can fit the socket and still be wrong for the engine. Compare thread diameter, reach, seat design, electrode type, gap, and heat range before installation. Packaging errors and catalogue mistakes are uncommon but possible.
A German car maintenance guide also makes a useful general point: service history and engine variation matter more than broad assumptions about a vehicle’s country of origin.
Over-tightening or under-tightening plugs
Under-tightening can prevent proper sealing and allow the plug to loosen. Over-tightening can damage threads, distort the plug, or make future removal difficult. Use the specified torque with clean, suitable threads and the correct socket.
Avoid estimating torque by feel unless the repair information specifically permits it. A torque wrench is inexpensive compared with cylinder-head thread repair.
Forcing plugs into damaged or dirty threads
A plug should turn smoothly by hand for several rotations. If it binds, remove it and inspect both the plug and the cylinder-head threads. Dirt, cross-threading, or damage may require careful cleaning or professional repair.
Never use the ratchet to push a plug through resistance. The extra minute spent correcting alignment can prevent permanent damage.
Mixing old and new ignition components
Installing new plugs alongside a cracked boot or failing coil can leave the original misfire unresolved. If one component is replaced, inspect the remaining components for comparable wear and document what was changed.
That does not mean every coil must be replaced as a set. Test or inspect them, then replace only the parts that are faulty or outside specification.
Ignoring oil or coolant in the plug wells
Fluid in a plug well is a clue, not a cosmetic nuisance. Oil may point to a leaking seal or cover, while coolant can indicate a different sealing or cooling-system concern. Clean the well only after identifying and addressing the source.
A new plug installed into a contaminated well may fail again. Record the finding so it is not lost during later diagnosis.
Understand Mercedes spark plug replacement costs
The cost of a Mercedes spark plug replacement varies widely because engines differ in plug count, access, and surrounding parts. Parts prices, labour time, local rates, and the condition of the ignition system all influence the final invoice. An estimate should state what is included rather than presenting one universal figure.
Typical parts and labor price ranges
A basic service usually includes the plugs and labour, while a more involved job may include removal of covers, intake components, or other restricted-access parts. Ask whether the estimate covers diagnostic time, replacement seals, and post-repair testing.
Rather than relying on a generic online price, request a written quote based on the exact model and engine. The cost of quality aftermarket parts can vary by specification and supplier, so part numbers should appear on the estimate.
Factors that increase the total cost
Costs rise when access is difficult, plugs are seized, threads are damaged, or coils and boots need replacement. Oil or coolant leaks, intake faults, and active misfire diagnosis can also turn a routine service into a broader repair.
The number of cylinders is only one factor. Labour access and the condition of surrounding components can matter just as much.
Comparing dealership and independent shop pricing
A dealership may have model-specific tools, factory information, and technicians familiar with the vehicle. An independent workshop may offer different labour rates and still be well equipped for the job. Compare the stated parts, warranty, diagnosis, and testing rather than the headline price alone.
Ask whether the shop will show the removed plugs and explain any additional recommendation. Clear communication is part of a fair comparison.
When DIY replacement can save money
DIY work can reduce labour cost when access is straightforward and the owner has the correct tools, time, and confidence. It is less attractive when the plugs are difficult to reach, the engine is unfamiliar, or a seized plug could create a larger repair.
A useful local repair planning guide illustrates a broader principle: preparation and accurate information improve decisions before money is spent. For vehicle work, that means confirming the procedure and part fitment first.
Additional repairs discovered during service
Inspection may reveal worn coils, damaged connectors, oil leaks, or carbon deposits. These findings should be separated from the original plug replacement on the estimate, with an explanation of whether each item is urgent or can wait.
Do not approve unfamiliar work solely because the plugs are already removed. Ask what evidence supports the recommendation and whether delaying it creates a clear risk.
Verify the repair and maintain engine performance
The repair is not complete when the new plugs are tightened. Start the engine, listen for changes, and confirm that all components are secure. A short verification drive followed by a review of diagnostic information can catch a loose connector or remaining fault early.
Checking for misfires after installation
Let the engine idle and observe whether it starts cleanly, settles into a stable idle, and responds normally to light throttle. If a misfire remains, shut the engine down and recheck coil connections, plug seating, and the original diagnostic direction.
Do not keep driving while the engine is shaking or the warning light is flashing. Continued misfire can cause secondary damage.
Clearing and monitoring diagnostic trouble codes
Codes should be recorded before clearing them because they preserve useful diagnostic context. After the repair, clear codes only according to the vehicle’s procedure, then monitor whether they return during normal operation.
A code that comes back immediately suggests the plug change did not address the underlying fault. A code that returns only under load may require a more specific road test and further testing.
Confirming smooth idle and reliable starting
A healthy result includes reliable cold starting, a steady idle, predictable acceleration, and no unusual fuel smell. Compare the engine’s behavior with the symptoms that prompted the repair rather than assuming any new plug has solved every complaint.
If the engine still hesitates, check for air, fuel, compression, and ignition issues as appropriate. Spark plugs are one part of a larger system.
Recording the service for future maintenance
Write down the date, mileage, plug part number, engine code, and any related components replaced. Keep photographs or the invoice with the vehicle’s maintenance records. Clear documentation makes the next interval easier to plan and helps a future technician understand what has already been done.
It can also prevent duplicate work when the vehicle changes owners or visits a different workshop.
Planning the next inspection interval
Use the manufacturer’s specified interval as the baseline, then adjust attention to the vehicle’s operating conditions and symptoms. Inspect sooner if the engine develops a rough idle, hard starting, reduced response, or a new warning light.
A simple service reminder is enough. The goal is not to replace parts early without reason, but to avoid allowing a small ignition issue to become a larger drivability problem.
Conclusion
A careful Mercedes spark plug replacement starts with correct identification and ends with verification, not simply with fitting new plugs. Use the proper specification, work on a cool and clean engine, follow the torque procedure, and investigate related ignition or fluid issues when they appear. With accurate records and sensible inspections, the repair can restore dependable starting and smooth engine operation without unnecessary parts or guesswork.
Frequently Asked Questions
How often should Mercedes spark plugs be replaced?
The interval varies by engine, model year, plug type, and operating conditions. Use the owner’s manual and service records as the primary reference, then inspect sooner if drivability symptoms appear.
What are the most common signs of worn spark plugs?
Common signs include rough idling, difficult starting, hesitation, reduced acceleration, poorer fuel economy, and misfires. Other ignition, fuel, air, or mechanical faults can produce similar symptoms.
Can I replace spark plugs while the engine is warm?
It is safer to work on a completely cool engine. Heat can increase the risk of thread damage, burns, and inaccurate installation, particularly with aluminium cylinder heads.
Should all spark plugs be replaced together?
Usually, replacing the full set at the same service keeps wear consistent and avoids leaving old plugs beside new ones. The correct number depends on the engine configuration.
Do new spark plugs improve fuel economy?
They may restore normal operation when worn or fouled plugs are causing incomplete combustion or misfires. They will not correct unrelated fuel, air, sensor, or mechanical problems.
Is a flashing check-engine light safe to ignore?
No. A flashing light can indicate an active misfire that may damage the catalytic converter. Reduce load, stop if the engine runs badly, and arrange diagnosis promptly.
What should I do if a new plug will not thread by hand?
Stop and remove it. Check the plug, socket alignment, and cylinder-head threads for dirt or damage. Never force the plug with a ratchet, because cross-threading can create an expensive repair.