

Key Takeaways
A suspension noise is a useful clue, but it is rarely a diagnosis by itself. Note the sound, location, driving conditions, and any change in handling before choosing a Mercedes suspension noise fix.
- Match the sound to when and where it occurs.
- Inspect bushings, links, joints, mounts, shocks, and hardware.
- Use safe checks at home, but avoid working beneath an unsupported vehicle.
- Treat air suspension faults as specialized repairs.
- Arrange an alignment after major suspension work.
Identify the type and location of the suspension noise
Suspension noises often seem alike from inside the cabin, especially with road and tire noise masking the source. A careful description gives a technician a much better starting point than “it makes a sound.” Record whether the noise is a clunk, rattle, squeak, creak, or grinding sound, then connect it to speed, steering, braking, and road surface.
The goal is not to name the failed part immediately. It is to narrow the possibilities and determine whether the vehicle remains safe to drive. A Mercedes suspension noise guide can also help you compare common symptoms before booking an inspection.
Distinguish clunks, rattles, squeaks, and grinding sounds
A single heavy clunk over a pothole may suggest movement in a joint, bushing, link, or mount. A light rattle can come from loose hardware or a nearby component vibrating against the body, while a squeak often points toward dry or deteriorated rubber. Grinding deserves more caution because it may involve a damaged bearing, spring, shield, or another part contacting a rotating surface.
Describe the sound in ordinary words and note whether it changes with the weather. Damp conditions can temporarily alter the sound from rubber components, but that does not prove the underlying wear has disappeared.
Compare front, rear, and corner-specific noises
Ask a passenger to listen while you drive slowly on a familiar road, if doing so is safe. A noise that seems to come from the front may actually travel through the body from the rear, so compare left and right sides rather than relying only on cabin acoustics. Corner-specific sounds are especially useful when one side has a worn link, joint, mount, or damaged spring.
Rear rattles are commonly easier to hear at low speeds over uneven pavement. For another perspective on that pattern, see this rear suspension rattle guide, then use it as background rather than a substitute for inspecting the vehicle.
Note when the noise occurs during driving
Write down the exact trigger: turning into a driveway, braking, accelerating, crossing a speed bump, or traveling over repeated small ripples. Also note whether the steering wheel pulls, the car feels loose, or the body bounces more than usual. These accompanying changes matter more than the noise alone because they can indicate a handling or tire-contact problem.
A noise that appears only while turning may lead the inspection toward different components than one that occurs only when the suspension compresses. Highway-speed humming or rumbling also deserves separate attention because it may not be a suspension fault at all.
Use a road test to reproduce intermittent sounds
Intermittent noises are easiest to diagnose when the conditions are repeatable. Use the same stretch of road, similar speed, and the same steering input, while another person listens if possible. Do not deliberately strike potholes or drive aggressively just to reproduce a sound.
Before visiting a shop, a short recording can preserve the character of the noise. Include a spoken note about speed and maneuver, but keep your attention on the road and stop if handling changes.
Understand the most common causes
Suspension systems combine rubber bushings, ball joints, links, springs, dampers, mounts, and fasteners. Wear in one part can load its neighbors, which is why replacing the first visibly worn item does not always silence the car. The inspection should consider the whole corner and the way the components move together.
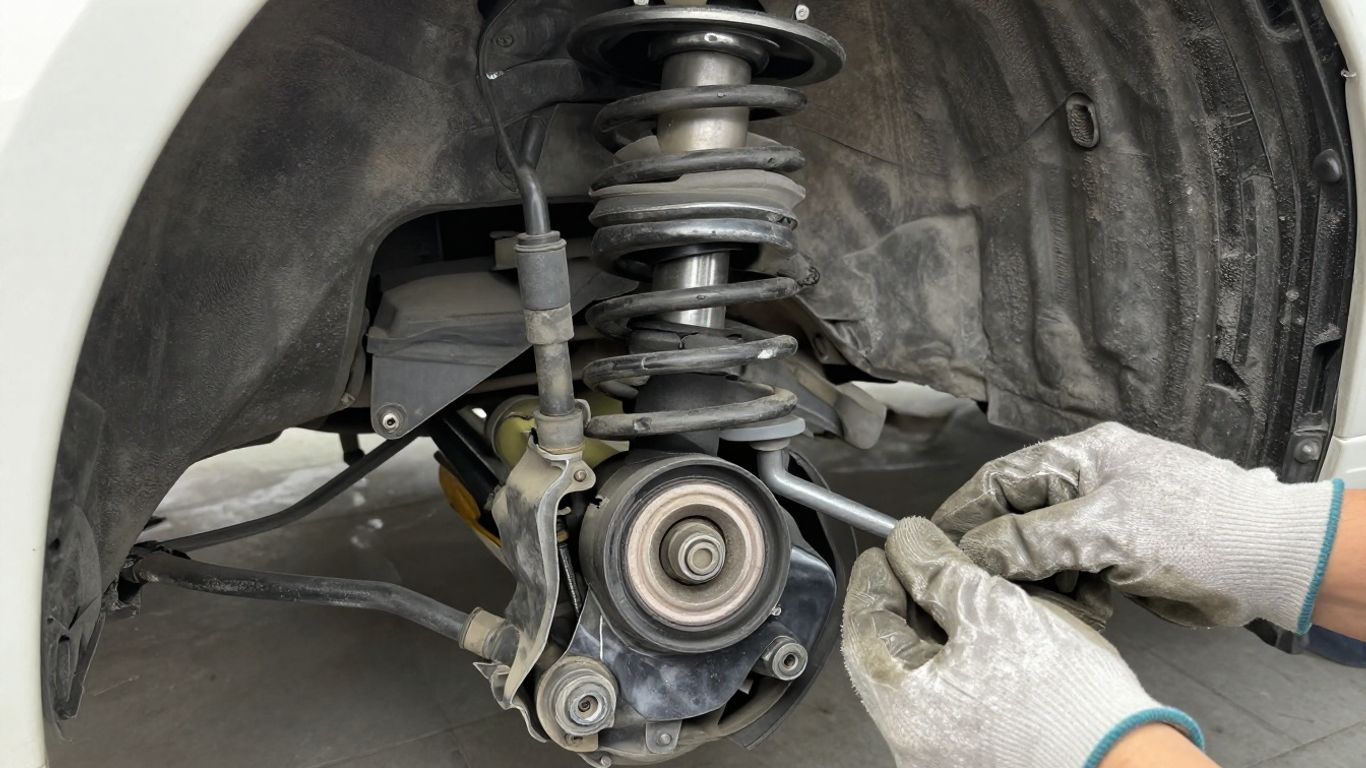
Age, road salt, potholes, mileage, and previous repairs all influence what fails first. The following image shows the kind of underbody view a technician may use when tracing a noise.
Inspect worn control arm bushings and ball joints
Control arm bushings can crack, split, or soften until the arm shifts more than intended. That movement may create a knock during braking, acceleration, or bumps. Ball joints can also develop looseness, and their condition matters because they help guide the wheel while the suspension moves.
Look for torn rubber, displaced sleeves, or grease escaping from a joint. A visual check can suggest a problem, but it cannot reliably confirm every internal failure.
Check sway bar links, mounts, and bushings
Sway bar links and bushings are frequent suspects when a vehicle rattles over small, sharp bumps. A link with play may tap as the suspension moves, while a bushing that has hardened or shifted can creak or knock during body roll. Brackets and their fasteners should be inspected at the same time.
Installation matters here. Incorrectly seated hardware or a loose bracket can create a new noise after otherwise sound parts have been fitted. This sway bar noise explanation offers a useful reminder to distinguish a squeak from a clunk.
Examine shocks, struts, and top mounts
A leaking shock or strut may leave an oily film on its body, although the absence of visible fluid does not prove it is healthy. Weak damping can cause repeated bouncing, uneven tire contact, or a sharper impact over bumps. At the top of a strut, a worn mount or bearing can produce noise as the steering turns.
The inspection should include the spring, spring seat, dust boot, and mount. A broken coil can make the car sit unevenly and may create a serious noise when the suspension moves.
Look for loose, damaged, or corroded hardware
Not every rattle comes from a failed suspension part. Loose underbody shields, exhaust components, brackets, wheel hardware, or retaining clips can vibrate and imitate a suspension fault. Corrosion can reduce clamping force or make a previously serviced joint difficult to assess.
Check for fresh witness marks, shiny contact points, missing fasteners, and bent brackets. Do not assume that tightening the loudest-looking bolt is the complete repair; the correct torque and installation position still matter.
Consider air suspension components on equipped models
Vehicles with air suspension add air springs, lines, valves, height sensors, and compressor-related components to the inspection. A leak may lower one corner after parking, while a compressor or valve problem can affect ride height and produce unusual operating sounds. The noise may therefore be accompanied by a warning message or an uneven stance.
Do not loosen pressurized air-suspension fittings casually. A qualified technician can isolate the system, measure pressure, and check electronic height information without creating another fault.
Diagnose the problem safely at home
Home inspection is useful for collecting evidence, not for replacing a professional diagnosis. Park on level ground, use good lighting, and compare the left and right sides. If the vehicle has a warning light, changed ride height, steering instability, or a leaking component, limit driving and arrange service.
Keep a record of what you see and hear. A few clear observations can reduce diagnostic time, especially when the noise disappears before the appointment.
Perform a visual inspection for wear and leaks
Start with the tires, wheel wells, springs, dampers, bushings, and visible links. Look for uneven tire wear, cracked rubber, fresh fluid, a sagging corner, damaged coils, or parts that appear out of position. A flashlight and a camera are usually more useful than trying to reach into tight spaces.
Do not spray lubricant on a noisy joint as a diagnostic shortcut. It may temporarily change the sound while hiding the condition of a component, and some products can damage rubber.
Check wheel and suspension fasteners
With the vehicle on the ground, check that the wheel fasteners appear present and seated, but do not use excessive force or guess at torque. Examine accessible suspension nuts and bolts for obvious looseness, missing retainers, or corrosion. If a wheel has recently been removed or suspension work was performed, mention that history to the repair shop.
A practical inspection sequence keeps the search organized:
- Confirm tire condition and wheel security.
- Compare ride height from side to side.
- Inspect visible rubber, springs, and dampers.
- Look for loose shields, brackets, or exhaust parts.
After these checks, stop rather than escalating to forceful prying or disassembly without the right tools. The list is intended to improve the handoff to a technician, not encourage unsafe improvisation.
Test for excessive movement with the vehicle lifted
A lifted vehicle must be supported by properly rated jack stands on suitable support points; a jack alone is never enough. Once safely supported, a technician may check for play at the wheel and inspect how joints respond to controlled movement. Home users should avoid placing hands near pinch points or forcing parts that may be loaded by a spring.
A bounce test from the ground can provide a rough clue about repeated body movement, but it cannot clear the rest of the system. A quiet bounce test does not rule out a noise that occurs only while cornering or braking.
Know when specialized Mercedes diagnostic equipment is needed
Electronic diagnosis becomes more relevant when the vehicle has air suspension, ride-height warnings, steering or stability messages, or a fault that cannot be reproduced mechanically. Scan data can help identify stored system faults, but it does not replace checking the physical components that may be loose or worn.
For complex systems, choose a shop familiar with the vehicle’s suspension layout and service procedures. The best result combines a road test, physical inspection, and electronic testing when the model requires it.
Choose the right Mercedes suspension noise fix
The correct repair follows the failed component and the reason it failed, rather than the sound’s name alone. A bushing, link, mount, shock, or air spring each calls for a different procedure, and some repairs affect alignment or ride-height calibration. Ask the technician to explain the confirmed fault and any related wear before approving work.
Parts selection also matters. A low-cost component that fits poorly or has the wrong specification can recreate the noise, so compare the part number, design, and warranty with the vehicle’s exact model and suspension type.
Replace worn bushings, links, or ball joints
Replace a bushing, link, or ball joint when inspection confirms cracking, separation, looseness, or damaged protection. Depending on the design, a shop may replace an individual part or a complete arm. The decision should account for access, labor, the condition of nearby components, and whether the part is available separately.
After installation, the fasteners must be tightened according to the service procedure. Some rubber-bushed joints need final tightening at normal ride height so the bushing is not preloaded.
Repair leaking shocks and damaged strut mounts
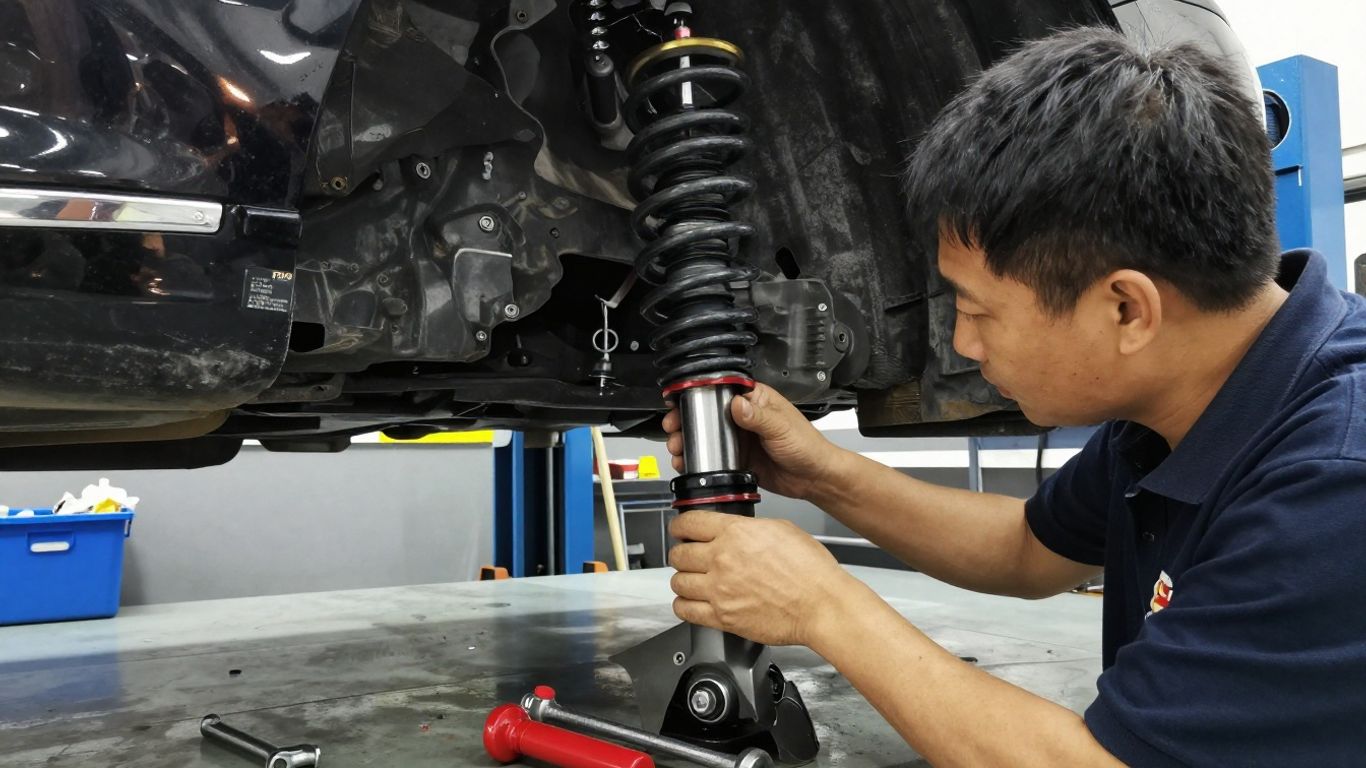
A leaking or weak damper generally requires replacement, while a damaged top mount or bearing should be renewed when it is the source of the noise. Because spring and strut assemblies store substantial energy, disassembly requires the correct compressor and equipment.
Replacing only the visibly wet part may not be enough if the mount, boot, seat, or spring is also worn. The repair should restore both damping and secure movement through the steering and suspension range.
Address rear suspension rattles and loose components
Rear rattles can come from control arms, shocks, sway bar parts, shields, exhaust components, or loose brackets. Begin with a road test and visual inspection rather than assuming every rear noise is an air-suspension issue. A rear noise diagnosis guide is useful for organizing those observations.
Once the source is confirmed, repair the loose or damaged component and inspect the surrounding fasteners. If a rattle began after recent work, have the installation checked before replacing unrelated parts.
Service air suspension compressors, valves, and air springs
Air suspension repairs may involve leak testing, compressor operation, valve control, height sensors, or an air spring that no longer holds pressure. The system may need to be depressurized and recalibrated using model-appropriate procedures. These jobs are poor candidates for trial-and-error part swapping.
A vehicle that sinks overnight or repeatedly runs its compressor should be serviced promptly. Continuing to operate it that way can place extra demand on the compressor and leave the vehicle with an unsafe or uncomfortable ride height.
Use Mercedes-compatible replacement parts
Confirm compatibility by vehicle identification number, model year, axle, engine, and suspension configuration. Matching dimensions alone may not be sufficient when mounts, links, sensors, or air-suspension components have model-specific designs.
Ask for the proposed part numbers and keep the repair invoice. This makes future diagnosis easier and helps distinguish a genuine recurrence from a different noise elsewhere in the suspension.
Avoid mistakes during suspension repairs
Suspension work affects steering geometry, wheel control, and the vehicle’s ability to maintain tire contact. A rushed repair can create a second noise or leave a fastener under the wrong load. Work methodically, follow the service information for the exact model, and stop when the required equipment is not available.
The quietest repair is not always the cheapest first repair. It is the one that identifies the source, corrects the underlying wear, and verifies the result with a road test.
Do not drive with severe clunking or steering changes
Stop driving if a loud clunk is accompanied by wandering, sudden pulling, a tilted vehicle, steering looseness, a broken spring, rapid ride-height loss, or a tire rubbing another part. These symptoms can indicate a component that may affect control rather than comfort alone.
If the vehicle must be moved, keep the distance minimal and use professional recovery when handling is uncertain. A suspension noise that suddenly becomes louder should not be treated as a minor inconvenience.
Support the vehicle correctly before working underneath
Use a level, firm surface, engage the parking brake, chock suitable wheels, and place jack stands at the manufacturer’s support points. Never rely on a hydraulic jack while any part of your body is beneath the vehicle. Keep clear of springs and air-suspension components that may release stored energy.
If you cannot verify the support points or the vehicle’s stability, leave the inspection to a shop. The risk of a fall is far greater than the value of a quick look underneath.
Tighten suspension components at the correct ride height
Many suspension joints use bonded rubber that must sit near its normal operating position when finally tightened. Tightening them while the suspension hangs can twist the bushing at rest, shortening its life and sometimes causing a new creak or harshness.
The exact procedure varies by component and model. Use the specified torque, sequence, and ride-height condition rather than relying on feel or a generic tightening habit.
Replace related parts when wear is widespread
If several bushings are cracked, one side has clearly deteriorated, or the vehicle has high mileage, discuss whether related components should be inspected or replaced together. A single new part can make an adjacent worn part more noticeable, though replacement should still be based on condition rather than guesswork.
A balanced repair may reduce repeat labor, but it should be explained clearly. Ask which parts are confirmed faulty, which are recommended preventively, and which can reasonably remain in service.
Schedule a wheel alignment after major repairs
Control arms, ball joints, steering links, and some rear suspension components can change wheel angles when removed or replaced. An alignment check verifies that the tires point correctly and that the steering wheel is centered.
Alignment is also worthwhile after correcting uneven ride height or replacing parts following abnormal tire wear. It cannot fix a loose component, so suspension faults should be repaired first.
Estimate repair costs and prevent recurring noise
The price of a Mercedes suspension noise fix depends on diagnosis, access, parts, suspension design, and the number of worn components. A short inspection may reveal a loose bracket, while a complex repair may require spring compression, air-system testing, calibration, or alignment. Request a written estimate that separates diagnosis, parts, labor, and follow-up checks.
Do not compare estimates by labor price alone. The scope of inspection and the quality and compatibility of the proposed parts can matter more than a small difference in hourly rate.
Compare DIY parts costs with professional labor
A capable owner may handle a visual inspection or replace an accessible component with the correct tools and experience. Professional labor becomes more valuable when fasteners are seized, springs are under tension, alignment is affected, or air pressure and electronic calibration are involved.
When comparing options, include tools, replacement hardware, an alignment, possible diagnostic time, and the cost of correcting an installation error. Online advice about strength testing methods or an ergonomic pillow guide may be useful in unrelated contexts, but neither replaces vehicle-specific service information.
Understand how Mercedes model and suspension type affect pricing
A basic coil-spring setup usually has different labor and parts requirements from an electronically controlled or air-suspension system. Model packaging, access to fasteners, axle configuration, corrosion, and whether components are sold individually can all change the estimate.
Ask whether the quoted repair includes an alignment, ride-height reset, diagnostic scan, or road-test verification. Also confirm whether the estimate assumes one corner, one axle, or a broader suspension refresh.
Identify warning signs that require immediate service
Immediate attention is warranted when noise comes with steering changes, a sagging corner, a broken spring, fluid leakage, warning messages, tire contact, or rapidly worsening vibration. These signs suggest more than an irritating sound and may affect braking, handling, or tire wear.
Do not keep driving simply because the vehicle still starts and moves. A short inspection can prevent a damaged part from affecting other components.
Follow inspection and maintenance intervals
Routine inspections help catch cracked rubber, fluid leaks, corrosion, uneven tires, and changing ride height before a noise becomes severe. Pay particular attention after harsh pothole impacts, long periods on salted roads, or suspension modifications.
Keep records of parts replaced and the conditions that produced the original noise. Those details make recurring problems easier to separate from normal aging in another component.
Choose a qualified Mercedes repair shop for complex work
For air suspension, strut assembly work, persistent noises, or handling changes, choose a shop with the correct lifting, spring-compression, scan, and alignment equipment. Ask how the shop plans to reproduce the noise and verify the repair rather than accepting a parts-swapping approach.
A water filtration components catalog or a service disclaimer belongs to a different kind of maintenance conversation, but the same practical habit applies here: confirm compatibility, scope, and responsibilities before work begins. For suspension service, the relevant proof is a clear diagnosis, documented parts, and a satisfactory road test.
Conclusion
A suspension noise should be treated as a clue that deserves a structured inspection, not as a sound to ignore or mask. Record when it happens, inspect safely, and use a qualified technician when springs, air systems, alignment, or handling are involved so the repair restores quiet operation without compromising control.
Frequently Asked Questions
Can I keep driving when my suspension makes a clunking noise?
A mild noise without any handling change may allow a short, careful trip to a repair shop, but severe clunking, steering looseness, pulling, sagging, tire contact, or a broken spring calls for immediate service or recovery.
What is the most common cause of suspension noise?
Worn bushings, sway bar links, ball joints, shock mounts, loose hardware, and deteriorated dampers are common causes. The sound and driving conditions can narrow the possibilities, but inspection is needed for confirmation.
Why does the noise happen only over bumps?
Bumps move the suspension through a larger and faster range, which can expose play in a joint, link, mount, or bushing. Small road imperfections may produce a lighter rattle from loose hardware.
Can a bad shock absorber make a noise?
Yes. A damaged or worn damper, mount, boot, or spring seat can produce knocking or squeaking. A leak or repeated bouncing may support the suspicion, but a quiet damper can still have another nearby fault.
Is a rear suspension rattle always caused by air suspension?
No. Rear rattles can also come from sway bar parts, control arms, shocks, bushings, brackets, shields, exhaust components, or loose fasteners. Air suspension is only one possibility on equipped vehicles.
Should suspension parts be replaced in pairs?
Some components are commonly replaced across an axle for balanced performance, while others can be replaced individually when only one has failed. The decision depends on the part, wear on the opposite side, vehicle design, and the repair recommendation.
Do I need an alignment after suspension repairs?
An alignment check is recommended after repairs that can change wheel angles, including work on control arms, ball joints, steering links, or some rear suspension parts. It helps prevent uneven tire wear and confirms correct geometry.